To Integrate with Auth0 on Compyl:
-
NAME
-
User define name for integration
-
-
DESCRIPTION
-
User define description for integration
-
-
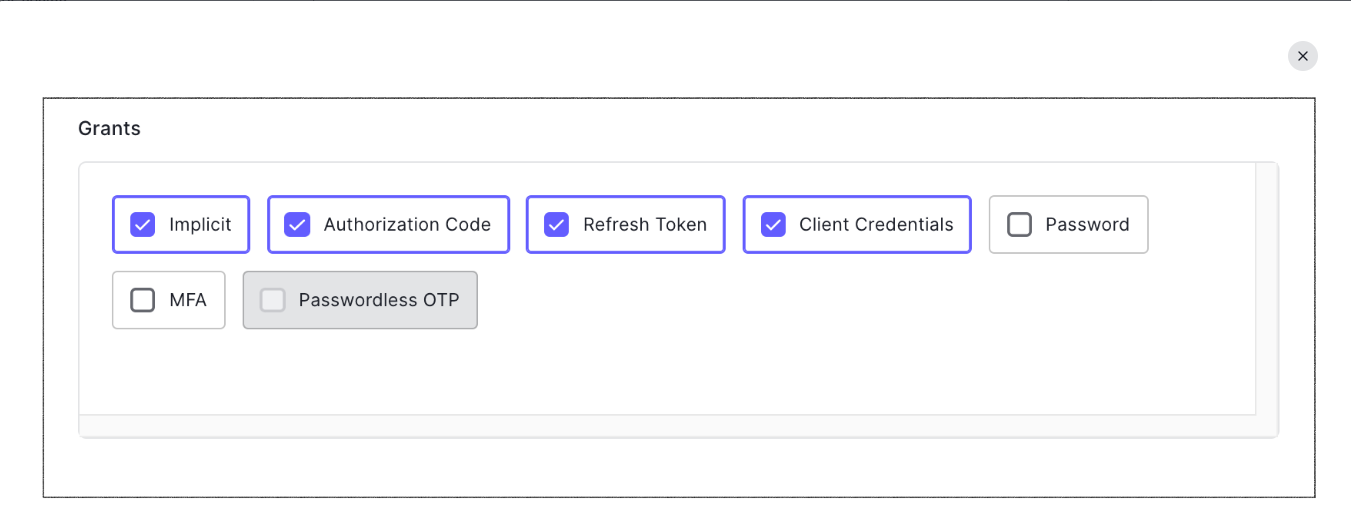
GRANT TYPE
-
Application grant types (or flows) are methods through which applications can gain Access Tokens and by which you grant limited access to your resources to another entity without exposing credentials. The OAuth 2.0 protocol supports several types of grants, which allow different types of access.
-
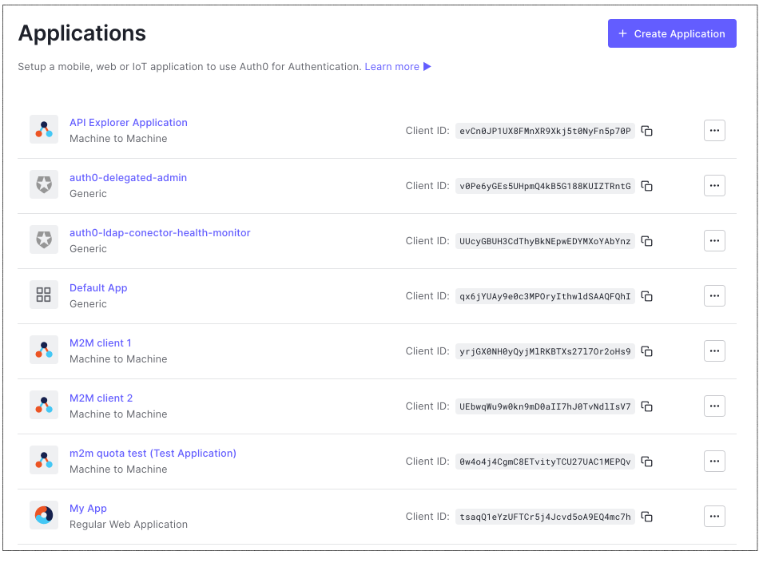
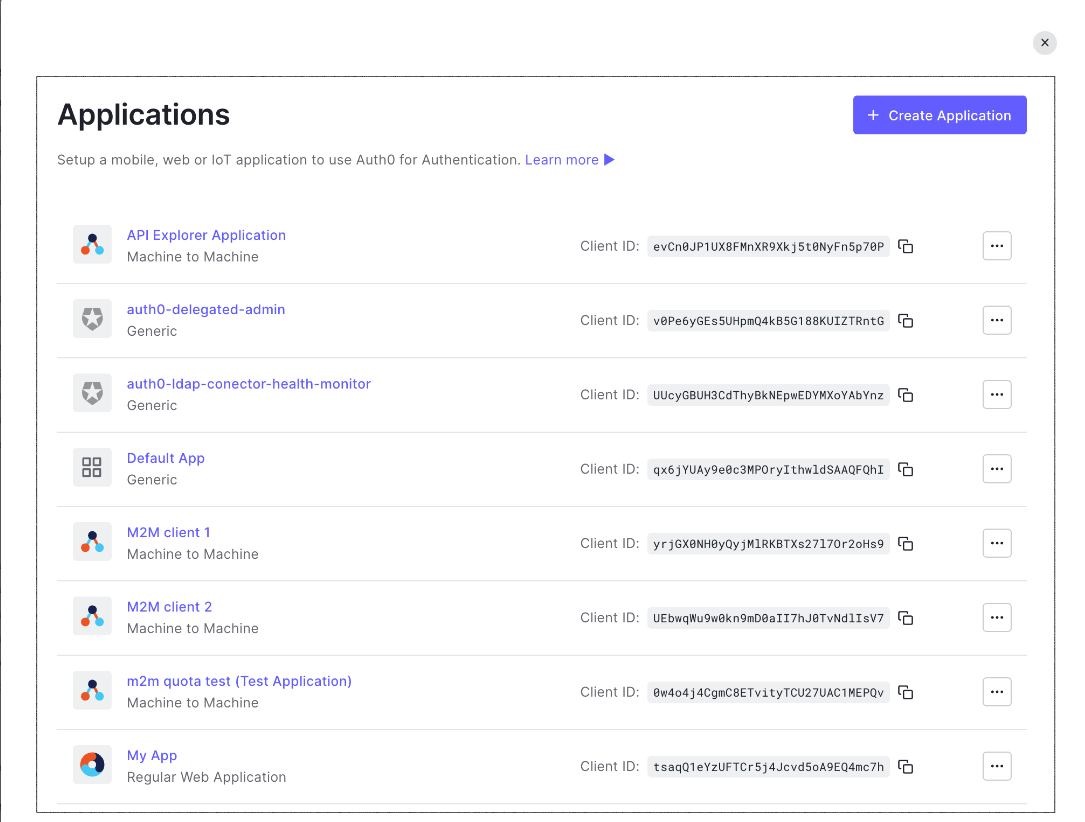
Use the Dashboard
-
Go to Dashboard > Applications > Applications and select the name of the application to view.
-
Scroll to the bottom of the page, and select Show Advanced Settings.
-
Select Grant Types, and enable or disable the appropriate grants for the application. When finished, select Save Changes. The device code grant type is only available for native apps.
-
-
Use the Management API
-
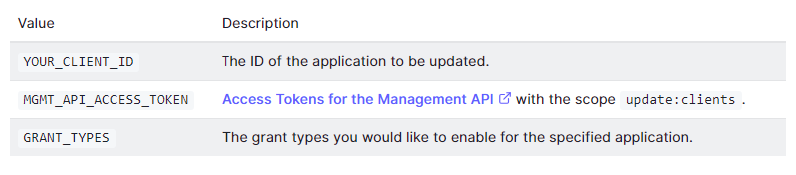
Make a PATCH call to the “/Clients/patch_clients_by_id” endpoint. Be sure to replace “YOUR_CLIENT_ID”, “MGMT_API_ACCESS_TOKEN”, and “GRANT_TYPE” placeholder values with your client ID, Management API access token, and desired grant type, respectively.
-
-
var client = new RestClient("https://{yourDomain}/api/v2/clients/%7ByourClientId%7D");
var request = new RestRequest(Method.PATCH);
request.AddHeader("content-type", "application/json");
request.AddHeader("authorization", "Bearer {yourMgmtApiAccessToken}");
request.AddHeader("cache-control", "no-cache");
request.AddParameter("application/json", "{ \"grant_types\": \"{grantTypes}\" }", ParameterType.RequestBody);
IRestResponse response = client.Execute(request);
-
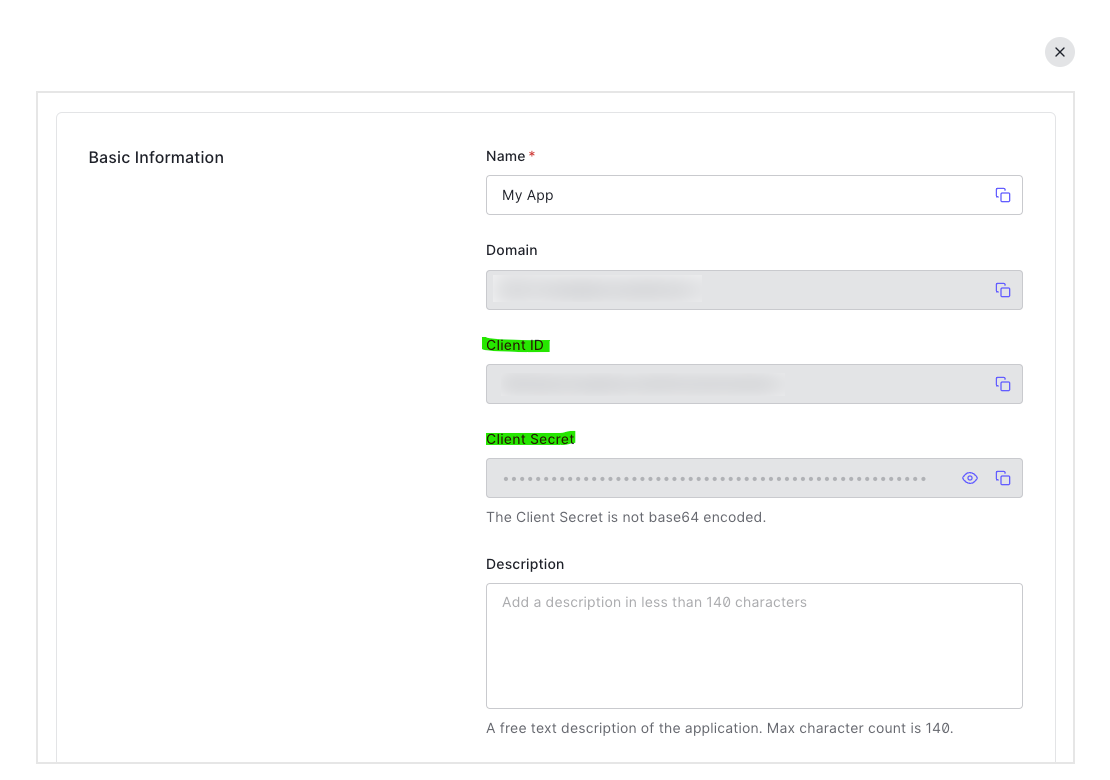
CLIENT SECRET and CLIENT ID
-
Client Secret authentication is a symmetric authentication method included in the OAuth 2.0 specification. Client Secret authentication is the default authentication method in Auth0.
You can change an application's client secret using the Auth0 Dashboard or the Auth0 Management API. When you rotate a client secret, you must update any authorized applications with the new value.
-
Rotate Client Secrets
-
Use the Dashboard
-
In the Auth0 Dashboard, go to Applications > Applications, and then select the name of the application to view.
-
Scroll to the bottom of the Settings page, locate the Danger Zone, select Rotate, and confirm.
-
Scroll to the top of the page, and switch to the Credentials tab.
-
View your new secret by locating Client Secret, and selecting the eye icon.
-
BASE URL
-
The Authentication API is served over HTTPS. All URLs referenced in the documentation have the following base: https://{yourDomain}
-
Where to find it?
-
Login to the Auth0 Dashboard: Go to the Auth0 Dashboard at
 Auth0: Secure access for everyone. But not just anyone. and log in with your Auth0 account credentials.
 -
Select Your Application: If you have multiple applications set up in your Auth0 account, select the specific application for which you want to find the base URL.
-
Find Your Domain: Once you are in the application's dashboard, look for the "Settings" section, often found in the left-hand sidebar. Under "Settings," you should see your Auth0 Domain or Tenant Name. If you see a domain like
Auth0: Secure access for everyone. But not just anyone. , then your base URL would be https://your-tenant-name.auth0.com. -
Use the Base URL: You can use this base URL to construct authentication and authorization URLs for your application when integrating with Auth0. It's often used as the base for login, logout, and callback URLs when configuring your authentication flows.
-
Note: Please note that the exact location of this information in the Auth0 Dashboard may change over time due to updates and improvements to the platform's user interface. If you have any difficulties finding your Auth0 base URL, you can also refer to Auth0's documentation or contact their support for assistance.
-
-
-
-
-
Creating API
Creating an API in Auth0 involves setting up a representation of your API within Auth0's identity and access management system. This allows Auth0 to handle authentication and authorization for your API. Here are the steps to create an API in Auth0:
-
Log in to the Auth0 Dashboard: Go to the Auth0 Dashboard at
Auth0: Secure access for everyone. But not just anyone. and log in with your Auth0 account credentials. -
Navigate to APIs: In the Auth0 Dashboard, click on the "Applications" tab in the left sidebar, and then select "APIs."
-
Create a New API: To create a new API, click the "+ Create API" button.
-
Configure the API: Fill in the details for your API:
-
Name: Give your API a name.
-
Identifier: This is a unique identifier for your API. It's commonly in URL format (e.g., https://api.example.com).
-
Signing Algorithm: Choose the signing algorithm for the JSON Web Tokens (JWTs) used for authentication. The default is RS256.
-
Allow Offline Access: You can enable this option if you want to issue refresh tokens for your API.
Note: Once you've filled in the necessary details, click the "Create" button to create the API.
-
-
Set Up Scopes (Optional): If your API uses scopes to define permissions for different types of access, you can configure them under the "Scopes" tab. Scopes can help you define fine-grained access control.
-
Define Permissions (Optional): Under the "Permissions" tab, you can define permissions associated with your API. These permissions can be linked to specific roles or groups in your application.
-
Implement Authentication in Your API: To secure your API, you will need to validate the JWTs issued by Auth0 in your API's code. You'll typically use the Auth0 public keys to verify the signature of the JWTs. Auth0 provides SDKs and documentation to help you implement this in various programming languages.
-
Test Your API: You can use the "Try Your API" tab to test your API by making requests and inspecting the JWTs that Auth0 issues.
That's it! You've now created an API in Auth0, and you can configure your applications to use Auth0 for authentication and authorization when accessing this API. Make sure to follow best practices for securing and protecting your API, and consider implementing role-based access control (RBAC) and other authorization mechanisms as needed.
Remember that the specific steps and options may vary slightly based on Auth0's interface and features, so it's a good practice to consult Auth0's official documentation for the most up-to-date information and guidance.
Generating API Key
To generate an API key on Auth0, you typically use API tokens, which are JWTs (JSON Web Tokens) that represent permissions. Here are the steps to generate an API key (API token) in Auth0:
-
Log in to the Auth0 Dashboard: Go to the Auth0 Dashboard at
Auth0: Secure access for everyone. But not just anyone. and log in with your Auth0 account credentials. -
Navigate to APIs: In the Auth0 Dashboard, click on the "Applications" tab in the left sidebar, and then select "APIs."
-
Create a New API: If you haven't already created an API in Auth0, you'll need to do so before generating an API key. Click the "+ Create API" button.
-
Configure the API: Fill in the required information for your API:
-
Name: Give your API a name.
-
Identifier: This is a unique identifier for your API. It's commonly in URL format (e.g., https://api.example.com).
-
-
Generate an API Key (API Token): After you've created your API, you can generate an API key (API token) by following these steps:
-
In the API dashboard, select the API you've just created.
-
Navigate to the "Settings" tab for the API.
-
Scroll down to the "Token Generator" section.
-
Fill in the required information, such as the desired token expiration and any required scopes or permissions.
-
Click the "Generate Token" button.
-
-
Copy the API Key: Once the token is generated, you'll be provided with the API key (API token). Make sure to copy and securely store this key because it may not be accessible again once you close the dialog.
Now you have generated an API key (API token) for your Auth0 API. This key can be used to secure your API endpoints and validate incoming requests from clients.
Please note that managing API keys and tokens should be done with care, and you should follow best practices for securing them. Additionally, you can implement more advanced authentication and authorization mechanisms like OAuth 2.0 with Auth0 for enhanced security.